Did you know that your digestive system composes 70% of your immune system? If our gut bacteria become out of balance, our immune system will become weak, and we will be more susceptible to illness.
Fortunately, one of the best and easiest ways to help maintain a healthy population of “friendly” gut bacteria is to consume fermented foods. Additionally, consuming fermented food will also help improve digestion, allowing your body to absorb nutrients more efficiently.
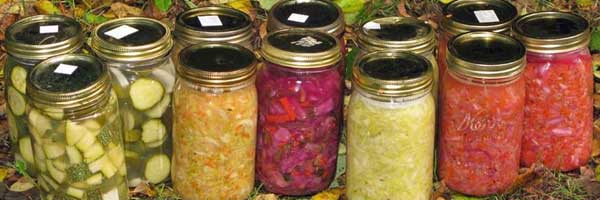
Although sauerkraut and kimchi are probably the first two that come to mind for most people, essentially any vegetable (and even fruits) can be fermented.
What you’ll need:
- Large glass mixing bowl
- Knife
- Grater, mandoline, or food processor
- Crock pot or large glass jars
Step 1 – Choose Your Ingredients
 There are many vegetables, herbs, and spices, and even fruits that can be used. In fact, there really is no limit as to what you can ferment, so start experimenting until you create your own delicious concoction!
To make a simple batch of sauerkraut, only cabbage is required.
Kimchi consists of cabbage, red pepper, radish, carrots, onions, garlic, ginger, and chili peppers (see full recipes at bottom of post).
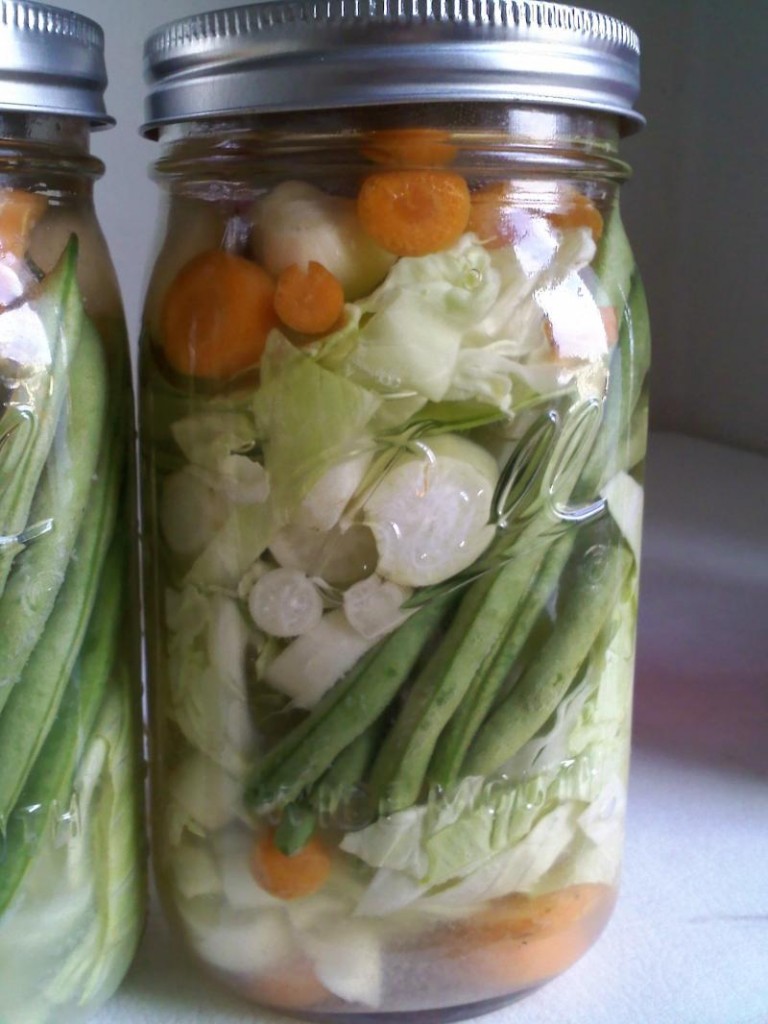
Here are more great additions:
- Beats
- Pepper
- Cucumber
- Zucchini
- Kale
- Apple
- Scallions
- Seaweed
- Asparagus
The options really are limitless, so don’t be afraid to try anything!
You may or may not want to use salt…
From www.wildfermentation.com:
“How much salt do you use? Traditionally vegetables have been fermented with lots of salt. In addition to pulling water from the vegetables, salt hardens pectins in the vegetables, rendering them crunchier, and discourages the growth of bacteria other than lactobacilli. By inhibiting competing bacteria, salt enables the vegetables to ferment and to be stored for longer periods of time. Since preservation has historically been one of the important motivations for fermentation, ferments have tended to be quite salty. But for health-conscious people interested primarily in flavor and nutrition, less salt can be better. Salt lightly, to taste. It is easier to add salt than to take it away, but if you oversalt, you can dilute by adding water and/or more vegetables. There is no magic proportion of salt the process requires—it’s just personal preference. As a starting point, try 3 tablespoons of salt per 5 pound of vegetables. More salt will slow the fermentation process; less (or none) will speed it up. Ferments with less salt may be more prone to surface molds. You can leave out the salt or use various mineral-rich substitutes such as celery juice (my favorite salt-free variation) or seaweed. Just be sure the vegetables are submerged in the liquid.”
Step 2 – Chop, Slice, and Dice!
Although you can manually prepare your vegetables with cutting tools, a food processor really makes the process much more efficient.
The goal here is to finely chop, great, and / or shred all of the ingredients to create greater surface area. This also breaks down the cell walls and extracts more of the vegetables natural juices, which will make up the brine.
Add all of your shredded vegetables (along with the juice) to a mixing bowl. You may want to use your hands to further mash the mixture at this point. If there is a fair amount of juice from the vegetables, this may not be necessary.
Step 3 – Add Chopped Veggies to Jar
Once the ingredients are ready, simply place them in jars, either with our without a top. Be sure to compact them, as it is crucial is that all of the vegetables sit below the brine. If there isn’t enough brine, add some water until all ingredients are fully submerged.
The length of time you ferment your vegetables will determine how it tastes. Normally the process takes at least 4-7 days. We recommend performing a taste test around the 4 day mark. If you are happy with the taste, put lid on jar and refrigerate. If not, continue the fermentation process further.
Recipes from around the web
There are plenty of great recipes available all over the web. Here are a couple that we enjoy:
Kimchi
Source: www.yumuniverse.com
Ingredients:
Try to buy everything organic.
Vegetables:
1 small head cabbage
1 red pepper
4-5 radishes
4 carrots
4-5 green onions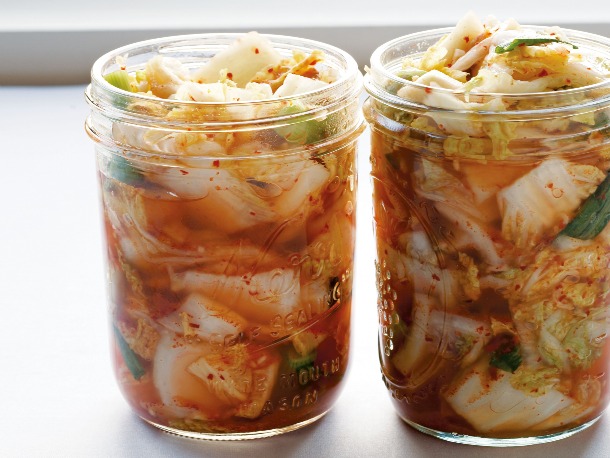
1 yellow onion
Seasoning Spice:
2 tbsp ginger
1/4-1 tsp crushed red pepper (less or more depending on your taste for spicy)**
1-4 chili peppers (less or more depending on your taste for spicy)**
5-6 cloves garlic
Brine:
2 cups water
2 tbsp sea salt
Sauerkraut
It doesn’t get much easier than this recipe from www.nourishedkitchen.com:
Ingredients
- 2 medium cabbage heads (about 4 to 5 total pounds, cored and finely shredded)
- 2 tablespoons sea salt (find unrefined sea salt here)
Instructions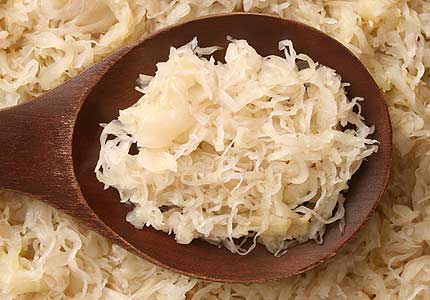
1. Toss cabbage and salt together in a large mixing bowl and begin to squeeze the cabbage and salt together with your hands, kneading it thoroughly to break up the cellular structure of the shredded cabbage.
2. When the cabbage has become limp and releases its juice, transfer it to a sauerkraut crock or vegetable fermenter (available here). Pack the salted cabbage into the crock or fermenter as tightly as you can, eliminating air bubbles. A kraut pounder (available here) is particularly helpful in packing the cabbage tight within the crock.
3. Continue packing the cabbage into the container until the cabbage is completely submerged by liquid. Cover loosely and allow it to sit at room temperature, undisturbed, for at least 1 month and up to 6 months, testing the sauerkraut every few days until it is done to your liking. Transfer to the refrigerator or other cold storage where it should keep for at least 6 months and up to 1 year.
Remember, almost anything goes when it comes to fermenting your own foods at home. Experiment until you come up with a combination of ingredients that you love.
Have you tried fermenting vegetables? Please share your recipes or comments below!
Where do I find celery juice or do I have to make my own?
Hi Consuela,
I have not see celery juice at the health food store before. I’d recommend investing in a juicer to make your own 🙂
I found this site as I want to start fermenting vegetables. But I’m confused. In the pictures, the vegetables are cut in rather large pieces. But the instructions imply that they will be shredded – pieces really small. Can you clarify this for me? Thank you.
Hi Donnalynne!
Both chopped or shredded will work fine 🙂
Regards,
Adam
Just read on Donna Shenk’s website that cultured veggies lose nutrition if they are cultured longer than just a few days. Also a commercial starter ensures better nutrition because of the probiotics in the starters that are not present when we just use salt